How to Choose the Right Base for Paver Patios
When it comes to building a long-lasting paver patio, the beauty is only as strong as what lies beneath it. The base—what your pavers sit on—is the foundation of your entire patio, and choosing the wrong materials or installing them incorrectly can lead to settling, shifting, and costly repairs.
At JBS Landscaping, we help homeowners in Columbia, NJ and surrounding areas install durable, low-maintenance patios by starting with a properly constructed base. In this guide, we’ll explain the importance of the base layer, compare your options, and show how professional installation protects your investment.
Why the paver base matters
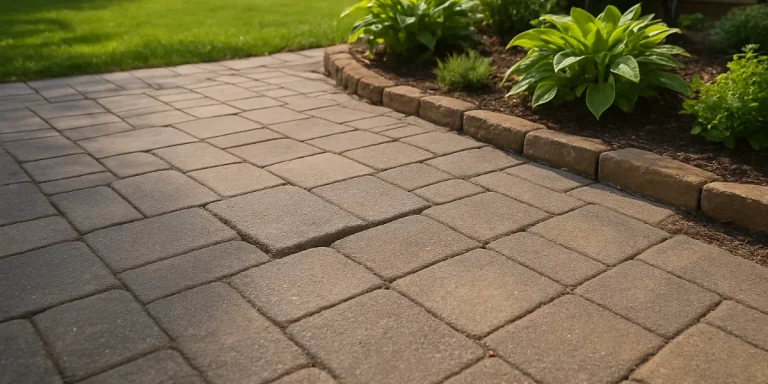
The success of any paver patio starts from the ground up—literally. Most patio problems don't begin with the pavers themselves, but with what's underneath them. If you're noticing uneven surfaces, loose pavers, standing water, or cracked joints, chances are the real issue lies in a poorly constructed base.
A properly installed base isn’t just a nice-to-have—it’s the foundation that ensures your hardscape stands the test of time. At JBS Landscaping, we’ve repaired countless patios across Columbia, NJ and surrounding areas that failed simply because the base was too shallow, poorly compacted, or made from substandard materials.
Here’s what a well-built paver base does:
-
- Supports the weight of foot traffic, furniture, and outdoor features
Whether you're placing patio furniture, fire pits, or planters, a solid base distributes weight evenly and prevents sinking. - Allows proper drainage to prevent pooling
The base is designed to help water flow away from the surface, protecting both the pavers and your home's foundation. When paired with our landscape grading and drainage solutions, this creates a complete system that prevents water-related damage. - Prevents shifting and settling over time
A compacted, leveled base keeps your pavers stable even through New Jersey’s harsh freeze-thaw cycles. This is critical for maintaining level surfaces in areas like paver walkways, driveways, and outdoor living spaces. - Reduces weed growth and joint erosion
A quality base helps keep the joint sand in place and discourages weeds from popping up between your pavers. Combined with proper polymeric sand installation and optional paver sealing, it creates a cleaner, more polished look that lasts.
- Supports the weight of foot traffic, furniture, and outdoor features
Without the right base, even the most premium materials will fail. We’ve seen beautifully designed patios degrade quickly because corners were cut during the foundational phase. That’s why every paver project we build at JBS Landscaping—whether it’s a backyard patio, retaining wall, or paver driveway—starts with expert base preparation tailored to the site’s soil conditions and drainage needs.
In regions like Morris, Sussex, and Warren Counties, where freeze-thaw damage and clay-heavy soils are common, this step is especially important. By investing in the right base up front, you're protecting your outdoor space from premature failure—and saving yourself money and frustration in the long run.
What materials can be used for a paver base?
Choosing the right material for your paver patio base is one of the most critical decisions in the hardscaping process. While all paver bases aim to provide stability, drainage, and long-term durability, not every material performs equally—especially in a climate like New Jersey where winter freeze-thaw cycles and heavy rainfall are common.
At JBS Landscaping, we evaluate each property’s soil conditions, elevation, and intended use before selecting the proper base. Here’s a breakdown of the most common base materials we work with, including their pros, cons, and when they should (or shouldn’t) be used.
1. Crushed Stone (Q.P. or DGA)
Quarry Process (Q.P.) or Dense Graded Aggregate (DGA) is the gold standard for most paver patio bases in New Jersey. It consists of a mixture of ¾" crushed stone and stone dust, which compacts tightly to form a stable, load-bearing surface.
Benefits of using Q.P. or DGA:
-
-
- Excellent drainage – The angular particles allow water to pass through while preventing pooling at the surface
- Strong compaction – Locks tightly when compacted, reducing the risk of shifting or settling
- Durable under freeze-thaw conditions – Performs well year-round, even in cold, wet climates like ours
- Locally sourced and cost-effective – Readily available in the region, keeping material costs reasonable
-
At JBS Landscaping, we use Q.P. or DGA for nearly every paver patio, walkway, driveway, or outdoor living space we install. It's reliable, long-lasting, and proven to hold up under the weight of furniture, vehicles, and changing seasons.
2. Recycled Concrete Aggregate (RCA)
Recycled Concrete Aggregate (RCA) is made from crushed, reclaimed concrete materials. It’s becoming more popular as an environmentally friendly alternative to virgin stone products. When installed correctly, RCA can offer solid support for certain hardscaping applications.
Pros of using RCA:
-
-
- Budget-friendly – Often more affordable than traditional crushed stone
- Sustainable – Diverts old concrete from landfills, making it a greener option
- Reasonably compactable – Can provide good structural support if screened and installed properly
-
Cons of using RCA:
-
-
- Potential inconsistencies – Material may contain leftover metal or uneven particle sizes
- Less reliable drainage – May retain moisture more than clean stone, which can impact performance in freeze-thaw cycles
- Requires testing – Should be screened and compacted carefully to ensure long-term stability
-
At JBS Landscaping, we only recommend RCA in limited cases—typically for light-use patios or temporary installations. When used, we ensure it's properly screened and compacted to avoid future problems with drainage or settling.
3. Sand-Only Base (Not Recommended)
Although tempting for DIYers, a sand-only base is one of the most common causes of paver failure in New Jersey landscapes. Sand and stone dust are often used as bedding layers, not structural base materials.
Drawbacks of using sand as a sole base:
-
-
- Lack of structural support – Sand alone cannot bear weight effectively over time
- Prone to erosion – Washout is common after heavy rain or snowmelt
- Moisture retention – Holds water, increasing the risk of frost heave and joint failure
- No compaction strength – Can’t be compacted into a stable foundation like crushed stone
-
While sand is appropriate for a thin bedding layer (typically 1 inch) directly beneath the pavers, it should never be used as the primary base. A proper base must include multiple compacted layers, with sand acting only as a leveling medium on top of a solid foundation.
If you’ve experienced settling, weed growth, or puddling on a patio installed over just sand, it may be time to consult with JBS Landscaping for a full base repair or patio rebuild.
How deep should your paver base be?
The depth of your base depends on the use of the patio and the condition of the existing soil.
-
- Walkways or light-use patios: 4–6 inches of compacted base
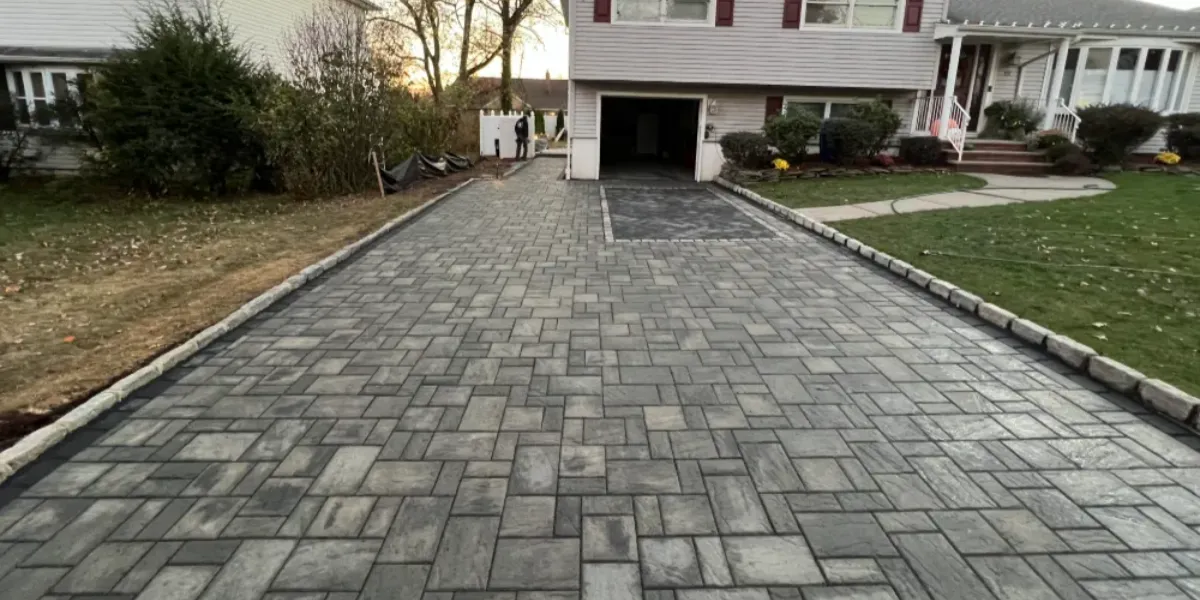
- Driveways or heavy-use patios: 8–12 inches of compacted base
- Poor soil or clay-heavy areas: May require deeper excavation and additional stabilization
At JBS Landscaping, we evaluate the existing soil and expected use of the space to determine the right depth for each project. We also use professional plate compactors in multiple passes to ensure the base is firm and level.
Base installation process: What to expect
When you hire JBS Landscaping for a professional paver patio installation, you're not just getting a beautiful outdoor surface—you’re getting a hardscape that’s built to last. A long-lasting patio begins with proper base construction, and every step of our process is carefully designed to ensure maximum stability, drainage, and long-term performance.
Here’s a closer look at how our team prepares and installs a solid base for your patio:
1. Excavation
We start by removing all surface material from the patio area, including grass, topsoil, and any soft, organic matter that could compromise the integrity of the base.
-
-
- Excavation depth is tailored to the size and use of the patio (e.g., deeper for driveways or high-traffic areas)
- We remove all roots and debris to prevent future movement or settling
- Excavated areas are shaped with proper slope for drainage
-
If the site has drainage issues or significant elevation changes, we may integrate landscape grading or retaining wall installation to stabilize the space before continuing.
2. Subgrade preparation
Once excavation is complete, we grade and compact the subsoil to create a strong, level foundation.
-
-
- The subgrade is shaped with a minimum 2% slope away from the house or structures to prevent water pooling
- We use mechanical plate compactors to eliminate air pockets and soft spots
- Proper subgrade compaction prevents future settling and ensures uniform support across the entire patio
-
This step is especially important in areas with clay-heavy soils, common in parts of Morris, Sussex, and Warren Counties.
3. Geotextile fabric (as needed)
In areas with soft or unstable subsoil, we may install a layer of geotextile fabric between the soil and the base material.
-
-
- Helps separate the subgrade from the aggregate base
- Prevents base material from sinking into the soil
- Improves overall stability and drainage over time
-
While optional, this step adds valuable reinforcement in locations prone to moisture or ground movement.
4. Base material installation
We install crushed stone aggregate, such as quarry process (Q.P.) or dense graded aggregate (DGA), in compacted lifts.
-
-
- Base is installed in 2–3 inch layers and compacted after each lift
- Total base depth ranges from 4 inches (for walkways) to 10+ inches (for driveways)
- We use professional equipment to achieve even compaction across the full area
-
This is the most important structural layer in your patio project. At JBS Landscaping, we never cut corners when it comes to base depth or compaction.
5. Bedding layer
Once the base is in place, we add a final 1-inch bedding layer of concrete sand or stone dust to help level the pavers and lock them into place.
-
-
- Provides a smooth, flexible setting bed for the pavers
- Allows for minor adjustments in height and alignment
- Aids in long-term leveling and performance
-
We screed this layer carefully to ensure a consistent thickness and proper slope before laying the pavers.
6. Edge restraint
Strong edge support is critical to keeping the pavers from shifting over time.
-
-
- We install rigid plastic or aluminum edge restraints secured with landscape spikes
- Curved or angled edges are cut and anchored precisely to match your design
- Edge restraints help hold the patio’s shape, even through freeze-thaw cycles or heavy use
-
This step is often overlooked in DIY installations but is essential to the long-term success of your patio.
7. Paver installation and jointing
Finally, we lay the pavers in the desired pattern, taking care to align spacing and elevation. Once in place, we finish the surface with proper jointing material and final compaction.
-
-
- Pavers are cut as needed to fit cleanly along borders and curves
- The surface is compacted again to settle the pavers into the bedding layer
- Polymeric sand is swept into the joints and activated with water to harden and lock the pavers in place
- We ensure drainage flows correctly and the final surface is level, stable, and beautiful
-
At JBS Landscaping, we also offer paver sealing after installation to enhance color, prevent staining, and extend the life of your patio.
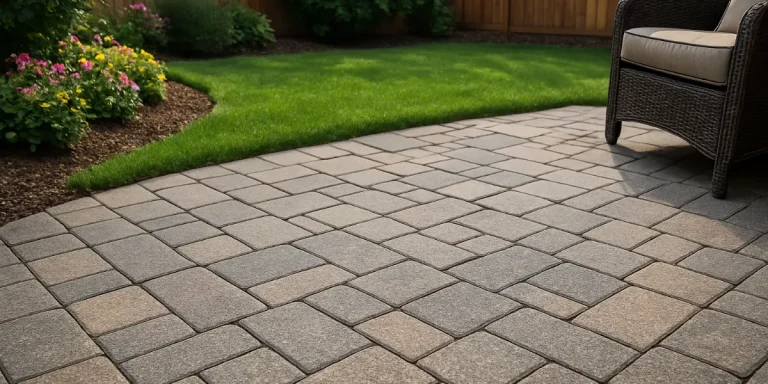
Built for long-term performance
Every layer of your paver patio—from excavation to final sanding—is constructed with drainage, stability, and aesthetics in mind. When you choose JBS Landscaping, you're choosing craftsmanship, precision, and a team that stands behind every patio we build.
Whether you're installing a new paver patio, walkway, or driveway, or upgrading your outdoor space with retaining walls or landscape lighting, we ensure the base is done right—because the success of your project depends on it.
Mini case study: Paver base correction in Newton, NJ
A homeowner in Newton hired us to fix a failing DIY paver patio that had developed dips and uneven areas after just two years. The original base was shallow and used only sand. We removed the pavers, excavated the area, installed a 6-inch Q.P. base with proper compaction, and re-laid the patio with fresh joint sand. The result was a level, stable surface that has held up beautifully through multiple winters.
Proudly serving Columbia and the surrounding area
JBS Landscaping provides expert paver patio installation, retaining wall construction, and full-service landscaping throughout Morris, Sussex, and Warren Counties, including:
-
- Columbia
- Allamuchy
- Budd Lake
- Chester
- Flanders
- Hackettstown
- Long Valley
- Newton
- Rockaway
- Sparta
- Succasunna
Whether you’re planning a new patio or replacing an old one, we’ll make sure it’s built on a solid foundation.
Build it right the first time—call JBS Landscaping
Schedule your paver patio consultation today
Choosing the right base is the most important step in building a patio that lasts. At JBS Landscaping, we bring years of experience, professional equipment, and proven techniques to every hardscape project. Contact us today to request an estimate and find out why homeowners across Columbia, NJ and beyond trust us for their patio installations.
Let us help you build something beautiful—and built to last.